Sunday, October 2, 2011

Hodgson Mill Gluten Free Cookie Mix


I was wandering around my local grocery store when I came upon this box of Hodgson Mills Gluten Free Cookie Mix.  I had never heard of the brand before but thought I would pick up a box since the ingredients said they are all natural (brown rice flour, sugar, tapioca starch, amaranth flour, cornstarch, baking soda, xantham gum, & flake salt).  When baking from scratch I like to substitute sugar with honey or agave nectar but thought I would give this new brand a whirl.

Another thing that appealed to me about the box was that this cookie mix is a base and you can add different things to the mix to customize it for the type of cookies you desire.  The back of the box even has 5 recipes listed on the back for almond cookies, pecan cookies, chocolate cookies, peanut butter cookies, & chocolate chip cookies.  I decided to make the chocolate chip ones.

Something else I liked about this mix is that there were few ingredients to add.  It calls for 1/2 cup butter, 3 Tbsp. vegetable shortening, 1 box of the Hodgson Mills gluten free cookie mix, 1 large egg, and 2 tsp. vanilla.  I actually substituted the shortening with coconut oil and felt like the consistency still turned out great.

I followed the recipe on the back of the box, with the exception of substituting the shortening for the coconut oil.  


After making the mix, I added the chocolate chips and created small cookies to place on the cookie sheet.


Then, I baked the cookies for 15 minutes at 350 degrees.  Last, I removed the cookies and let cool!


I suggest picking up a box of Hodgson Mills gluten free cookie mix for yourself.  They really were fantastic!  You can even visit their website and see the other great gluten free products that they make.  These include: brownies, cake mixes, pizza crust, bread mix, and pancakes & waffle mix.  I also visited Amazon and when I typed in Hodgson Mill gluten free, a bunch of other products also popped up including: muffin mix, lasagna noodles, penne, angel hair, & elbow pasta, and multi-purpose baking mix.  Check it out for yourself here and enjoy!

Sunday, September 4, 2011

SUN CUPS-Sunflower Butter & Chocolate (Gluten Free & Nut Free)


I think I've found my new weakness.  I've just recently discovered Sun Cups, which are essentially just like peanut butter cups but are made with sunflower butter.   These delicious, sweet treats are kosher, organic, nut free, and gluten free.

Since I am a huge fan of sunflower butter, these are quite the treat.  These cups come in both dark and milk chocolate and can be purchased either online or at a local grocery store that carries natural items.  I bought the dark chocolate ones at Raley's but also found them online at Amazon and other online merchants.  It looks like the manufacturer also makes caramel cups and mint cups-yum!  Here are links to just a few of the other online merchants I found:  Seth Ellis Chocolatier, Peanut Free Planet, and Natural Candy Store.


Monday, July 25, 2011

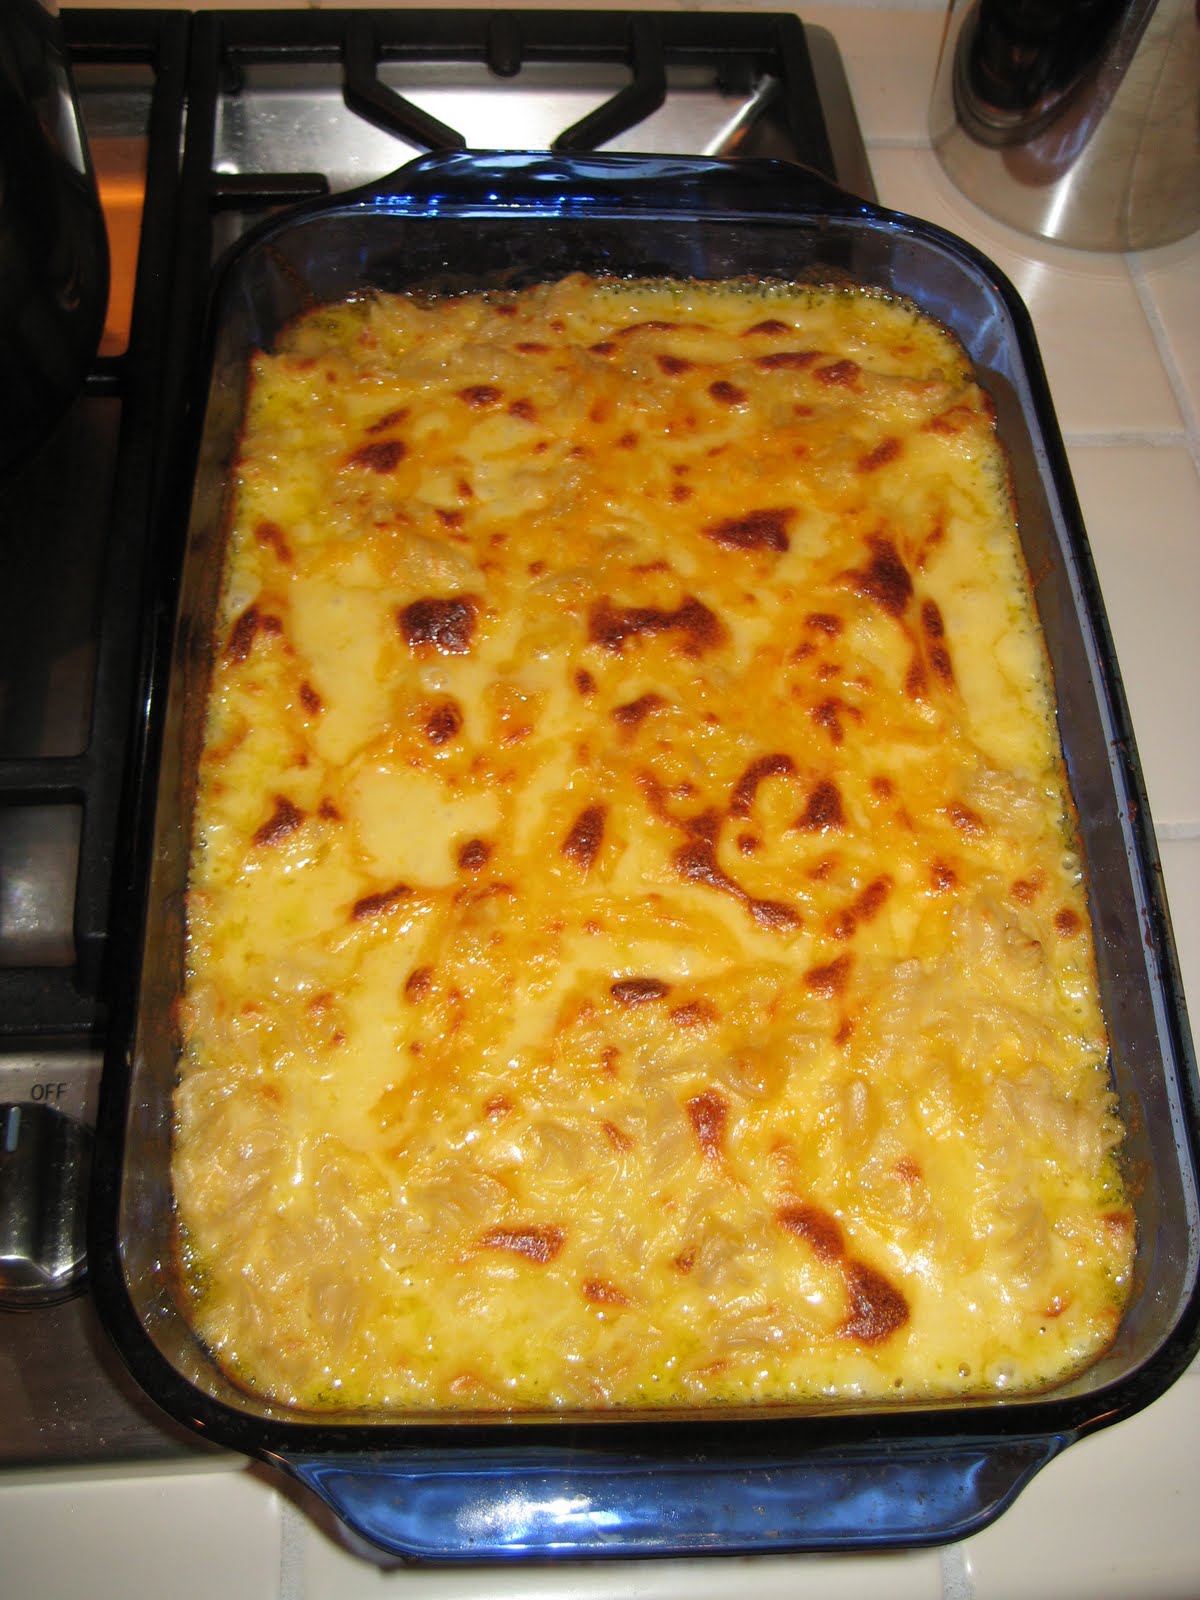
Homemade Macaroni & Cheese Recipe

Ingredients:
16 oz. bag of gluten free pasta
2 tbs. all purpose gluten free flour
2 tbs. butter
1 1/2 cups milk
4 cups of shredded sharp shredded cheese
A bit of shredded cheese to sprinkle on top


Directions:
Preheat oven to 350 degrees.

1. Bring a pot of water to a boil and cook 16 oz. of gluten free pasta.  (You can really use any type of gluten free pasta but I used Trader Joe's organic brown rice pasta).  When pasta is fully cooked, drain and pour into a large glass pan.

2.  In a small pot, melt 2 tbs. butter. 

3. Add 2 tbs. gluten free flour to butter and stir vigorously.  

 
4. Add 1 1/2 cups milk to the small pot and continue to stir with a whisk.


5. In the same small pot, slowly add 1 cup of shredded cheese at a time until you have added all 4 cups of cheese.  (For best flavor use sharp cheddar cheese.  I used 2 cups of sharp white cheddar cheese and 2 cups of sharp orange cheddar cheese.  However, if desired, you can use 4 cups of the same type of sharp cheese).  Stir vigorously with a whisk until the cheese is fully melted.


6.  Pour the cheese mixture over the pasta until all pasta is fully covered with cheese.  You can stir the cheese mixture around if desired.


7. Sprinkle some additional sharp cheddar cheese on top of the dish.


8. Bake macaroni and cheese for 25-30 minutes at 350 degrees.  When fully cooked, put oven on broil for a few minutes in order to crisp the top of the dish.


9. Let cool for a few minutes and serve.


Enjoy!

Thursday, June 30, 2011

JASON Kids Shampoo & Bath Gel


I've found two great new kids product!  If you enjoy natural products and love knowing that the products are both wheat and gluten free, even without having to read all of the ingredients, then these products are for you.  Both of these products are made by the brand JASON.  One of the products is a kids shampoo and the other is a kids bath gel.  The shampoo is extra gentle and the scent of the bath gel is berry burst.  Both products clearly state on the front label that they are wheat and gluten free, tear free, and paraben and sulfate free.  JASON products pride themselves on being pure, natural, & organic.   What more could you ask for in products for your little gluten free kiddo? 

You may be able to find these products at one of your local natural food stores but Amazon also sells them.  Follow these links below and check them out!


If you go to Amazon and type in Jason Kids, you'll actually find that JASON has an entire line of natural and gluten free kids products including shampoo, conditioner, bath gel, foaming hand soap, and toothpaste!

Tuesday, May 17, 2011

Cheesy Dinner Rolls-Gluten Free & Yeast Free

I used Chebe's Original Bread Mix to create these cheesy dinner rolls.  I simply followed the directions below, which are listed on the back of the package.


Ingredients:
1 package of Chebe Original Dinner Roll Mix
2 tbsp. oil
3/4 cup grated parmesan cheese
2 eggs
4 tbsp. water

Directions:


1. In a mixing bowl, use a spoon or fork to blend 1 package of Chebe Original Dinner Roll Mix, oil, parmesan cheese, and eggs.  Continue blending while adding 4 tbsp. water.


2. Knead dough with hands until it is smooth and well blended.  If too dry, add more liquid 1/2 tsp. at a time.  (I had to add one additional tbsp. of water and one tsp. of water).

3. Separate dough into 16 equal pieces and roll each piece into balls no more than 1" in diameter.  Place on a non-greased baking pan.

4. Bake in a preheated oven for 25 minutes or until lightly browned.  Serve warm.  Rolls should have a light crust with a soft chewy center.


I purchased this package of mix at Whole Foods but you can also purchase this yummy bread mix on Amazon.  It looks like they changed their package from the time I purchased mine, but it's the same product. I placed an order with Amazon yesterday.


http://www.amazon.com/Chebe-Bread-Original-7-5-Ounce-Bags/dp/B001ACMCNU/ref=sr_1_2?ie=UTF8&qid=1305779189&sr=8-2


Enjoy!

Saturday, May 7, 2011

Gluten Free Summer Camps


A great link for gluten free summer camps offered this summer, 2011.  This link also gives the names of the camps, the dates, the location, and provides a link to the summer camp's website.  Enjoy!


Tuesday, May 3, 2011

Namaste Pizza Crust Mix

Throughout my gluten free journey I have tried many gluten free pizza crust mixes.  However, my favorite by far is this Pizza Crust Mix by Namaste.  This brand has truly made an incredible pizza crust!  I do however feel that the crust is made even more spectacular when you bake the pizza on a pizza stone.  It makes the bottom of the crust crispy and in my opinion the entire crust cooks better throughout.  I have found the crust at Whole Foods but I like to buy it in bulk from Amazon.com in a 6 pack.  You can save tremendously on the price if you buy 6 packages of the crust at once.

First, follow the directions on the back of the package of the Namaste crust.  Depending on the size of your pizza stone, you may need to make 1 1/2 times the recipe for the crust.  Place the crust on the pizza stone.  (Tip: I smear olive oil on the bottom of the stone before placing the crust on there because the crust itself is a bit dry on its own).


To make my favorite type of pizza, you will need the following:  1 jar of Trader Joe's pizza sauce, 1 container of Trader Joe's pesto, 1 small can of Trader Joe's sliced black olives, colored peppers (I go between green, yellow, and red), 1 package of mozarella cheese, 1/4 pound of pepperoni from Whole foods.   Getting the pepperoni from Whole Foods is key because pepperoni from other stores is very fatty and is filled with many preservatives.  You can of course still make the pizza with other pepperoni but in my opinion the pepperoni from Whole Foods is top notch, truly adds to the overall flavor of this pizza, and should not be substituted.

Here are the steps to make this incredible pizza.  I promise, you will not be disappointed!

1.  Spread pesto all over the crust.  Then, on top of the pesto, spread the traditional red pizza sauce.


2.  Place a layer of pepperoni on the pizza.  (I think putting a layer of peperoni under the cheese is key).


3.  Place a layer of cheese on top of the layer of pepperoni.


4.  Place another layer of pepperoni on top of the cheese, followed by another layer of cheese.  

5.  Add your toppings.  I like to add black olives and two colors of peppers but that's up to you.


6.  Bake the pizza according to the directions on the package.  After it is cooked, broil the pizza for a few minutes to get that crispiness on the top layer.


I hope you enjoy this pizza as much as I do!